Essential Components of a Roof Replacement: A Complete Guide
May , 2024 | 10 min. read

If you have been surfing the internet and gathering information about your upcoming roof replacement project, you probably are either in one of two categories:
- You're frustrated because the information is scattered and not easily accessible
- You're overwhelmed by the inconsistent information that is available
Either way, we’ll assure you if you are in the research phase of your roof replacement process you have come to the right spot.
Here at RoofCrafters, we’ve been repairing and replacing roofs for homeowners like you since 1994, so we know a thing or two about the process. We also know that most homeowners don’t fully understand what roof components are included in the replacement, which oftentimes leaves them confused. We want to alleviate any roof replacement-related confusion and give you the facts.
So, all of this being said, in this article you’ll learn about all of the components needed to keep you covered, pun intended. Just to be clear so you don't waste any valuable time, I won't be going over the actual roofing materials such as shingles, metal, or tile roofing in this article. Instead, you’ll learn about all of the other materials needed to make up your complete roof system. Let’s dive in!
Understanding Roof Replacement Components
Below is a list of the key materials used in the roof replacement process.
- Wood decking
- Underlayment (Organic and synthetic roof underlayment)
- Ice and water shield
- Eave drip flashing (roof drip edge flashing)
- Pipe vent flashing
- Mechanical vent flashings
- Roof-to-wall, chimney, or skylight flashing
- Ventilation
1. Wood Decking: The Foundation of Roof Replacement
It is not uncommon for a new roof replacement to find soft or even rotten wood decking. Since the old roof that is being torn off is typically at least 12 to 20 years old. Whatever type and thickness of wood decking your home currently has.

These are the materials that we recommend using to replace any soft or rotten wood decking. Most homes have OSB or CDX plywood sheets that come in 4 by 8 sheets and different thicknesses but the most common is a ½ inch thickness.
2. Choosing the Right Underlayment for Weather Protection
The underlayment is the first layer that goes down directly over your wood decking. It serves as a moisture barrier between your wood decking and the roofing materials. This will help keep any humidity or moisture from getting in during a major wind event from damaging your wood decking.
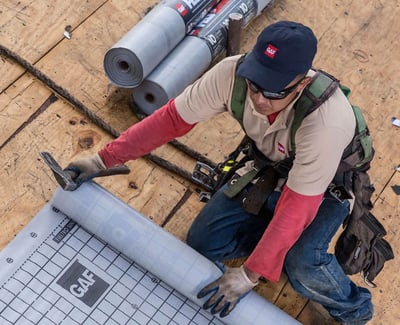
There are several types of underlayments, however, today the most commonly used underlayments are synthetic. They offer less weight and provide more robust protection. The organic felts are not as strong as the synthetic materials. They are a little less expensive and today they are mostly used on new construction homes, as a builder-grade material.

Your local roofing contractor will also use the underlayment to keep your home safe and dry during the tear-off process. When the underlayments are installed correctly they also serve as a waterproofing material that helps keep your home dry, in case of a pop-up shower during the construction.
3. Importance of Ice and Water Shield in Roofing
Ice and water shield is a rubberized bitumen material that gets installed in all the areas that have the greatest potential to leak.
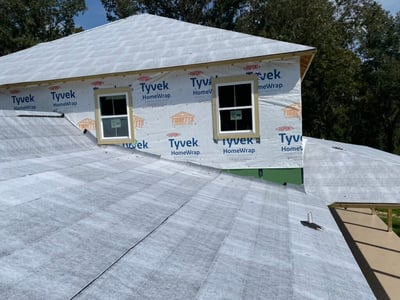
Areas such as:
- Valleys
- Pipes
- Vents
- Roof-to-wall flashings and transitions
- Skylights
- Chimneys
- Crickets
- Lower slope roof sections
- Along the roof edge or drip edge
 Photo Credit - GAF Roofing
Installing this extra layer of protection in and around the areas prone to leak will provide a second line of defense. This underlayment acts as a secondary waterproofing and many insurance carriers will reduce your homeowner's policy by up to 27% per year if you have this product installed on the entire roof.
4. Roof Drip Edge Flashing: Enhancing Water Drainage
The eave drip flashing sometimes called drip edge flashing or metal trim is the metal flashing that goes under the underlayment along the gable edge of your roofline and over your underlayment along the rake edge of your roofline. This flashing helps create a watertight seal between the roof materials and your facia and soffit material.
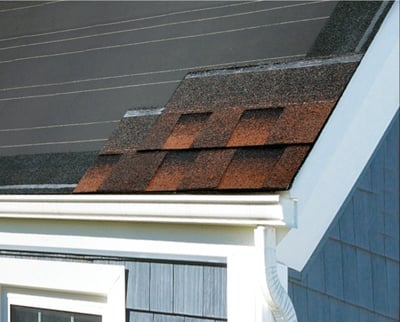
Eave drip flashing comes in many pre-painted colors and different material types such as:
- Copper
- Aluminum
- Steel
- Galvalume
The most common drip edge flashing is pre-painted steel or pre-painted aluminum if your home is near saltwater. Copper and galvalume provide a real raw metal finish, copper will bronze and patina. Galvalume will oxidize as well but will retain the silver raw metal look.
5. Securing Roof Penetrations with Pipe Vent Flashing
Every home has pipe vents going out through the roof these days. These are also referred to as penetrations. So to keep your home dry, a roofer must use some type of pipe vent flashing to seal the pipes.
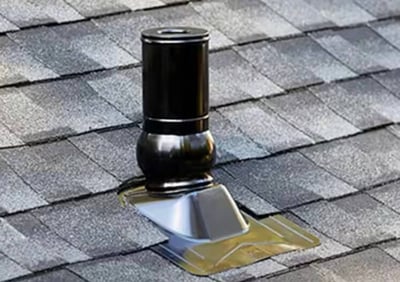
There are 4 common types of pipe vent flashings:
- Plastic with rubber gaskets
- Pre-painted steel with rubber gaskets
- Lead pipe boots
- Neoprene pipe boots
Because rubber gaskets will dry rot, the first two will require maintenance in the form of resealing or completely replacing before needing a new roof. While lead pipe boots require the least maintenance, small animals tend to chew on the lead.
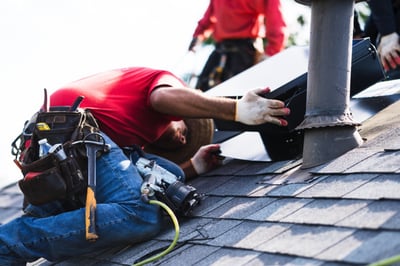
Neoprene pipe boots are typically used on metal roof installs but have become very common on all new roof replacements with neoprene retro pope boots. They allow a roofer to install around your weather head or power line service pole or any other pipe that may have service lines running to them.
This way they don't have to have the power cut off to install a new boot at the base of the pipe. Anywhere pipe vent flashing is installed, there would be an extra layer of ice and water shield under the flashings, as these are the areas most susceptible to roof leaks. All in all, it’s very useful.
6. Mechanical Vent Flashing for Optimal Airflow
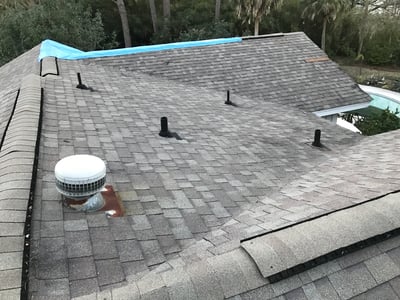
Mechanical vent flashing is used at any pipes or vents that service equipment inside your home. This would include your water heater, HVAC unit, bathroom or kitchen exhaust fan, and dryer vents. These are the most common mechanical equipment that will need to vent through your attic and roof.
This all depends on the exact location of the equipment. Ice and water shield would be installed under these mechanical vents as well. Don’t panic if you don’t see or have these vents on your roof! In some cases, the equipment is located along exterior walls. Equipment located on the exterior walls can vent out along the walls. Many dryers are set up this way.
7. Critical Flashing for Chimneys, Skylights, and Walls
To keep your home dry, metal flashing will likely be required unless you have a gable roof with no dormers, chimneys, or skylights. Some homes don't have any of these flashings but it is very uncommon.

Anywhere there is a vertical detail, meaning a dormer, a wall, a chimney, or a skylight that sticks out through your roof, your local roofer must install metal flashing to keep the water from entering at the transition point. We recommend using the same type of metal material as you selected for the eave drip. This keeps all the flashings on your home consistent.
 Photo Credit: Roofing Calculator
So, the flashing would be:
- Copper
- Aluminum
- Pre-painted steel
- Galvalume
Also anywhere flashing is installed, there would be an extra layer of ice and water shield as these are the areas most susceptible to roof leaks.
8. Ensuring Proper Roof Ventilation for Longevity
A new roof replacement would not be complete with proper ventilation. Improper roof ventilation is the cause of most premature roof failures. The attic gets very hot and thus causes the materials to heat up from the underneath side faster than they were designed to handle. This will cause the roof to fail before its stated lifespan.

The most common types of ventilation are:
- Whirlybirds
- Gable vents
- Off ridge vents
- Ridge vents
- Power vents
The exception is roofing with open or closed cell spray foam insulation that envelopes the entire attic down to the exterior walls. This insulation system creates an air-controlled environment that doesn't allow your attic to reach extreme temperatures.
Are You Ready for Your Roof Replacement?
You’re already one step ahead of the game. Now, you know all of the different components included in a complete roof replacement, along with the purposes they each serve. You can be sure of what to expect when you schedule your upcoming roof replacement.
If you’re just starting the process, you’re probably getting ready to find and hire a local roofing contractor. To locate a great local roofing contractor that’s the best fit for you, RoofCrafters has provided a checklist of questions to ask your local roofing contractor, along with the right answers that you need to get back when you meet with these roofing contractors.
If you are in the South Carolina, Georgia, or Florida area, drop us a line on our contact page to begin your roof replacement journey. If you’d like to learn more about your roof replacement, we recommend you read our article, "How Much Does a New Roof Cost?" next so that you can better understand the pricing points of your roofing project.
My name is Cassie, and I’m the Content Manager here at RoofCrafters. I was born and raised in Chicago, Illinois, and made my way out to Florida post-college graduation. I’m incredibly passionate about writing and creating valuable content that helps others with the collaboration of my marketing team. When I’m not working, I enjoy shopping (a little too much), spending time at the beach, and reading!
